How to Make Soy Wax Melts (Tarts) and Which Soy Wax to Use
Share
How to Make Soy Wax Melts (Tarts) and Which Soy Wax to Use
Melts are some of the easiest to make scent dispensers on the market today. They come in all shapes and sizes. You can use just about any wax to act as the base for a melt. But not all waxes have the same scent release and mold release properties.
For instance, you probably see a lot of melts that are poured into clam shells or other plastic containers. There couldn't be a simpler way to make melts. All you would do is mix your scent into your wax (amounts and mixing times vary according to brand) and pour into the cavity and let it cool. Then when you want to use one you would pop it out and add it to a melter. The issue that I have with these are that they are usually made with low melt point container wax. Which means they are made to adhere to the sides of the containers and are difficult to remove from the package and clean up is a pain.
If the warming plate of the melter is removable you can pop it in the freezer where the wax will contract and you should be able to get the wax out pretty easily. Or you could go to the other extreme and wash with warm soap and water. You would just want to be careful not to wash too much pf the wax down the drain.
To get around the messy problem I recommend using a votive soy wax. The melt point will be higher and they will be able to pop out of the mold and melter much easier. The only problem that I have run into using straight votive soy wax is that some melters do not get warm enough and the wax doesn't fully melt. To fix that problem we combine our votive and container wax. We add 20% GB464 to 80% Candle Cocoon Votive wax to get a melt that not only pops out of the container and burner easily but also has great scent throw.
You can make melts using a lot of different waxes but you will need to test as not all waxes retain or hold scent as well as other waxes. Even if you are using a soy wax. Remember that not all soy is created equal.
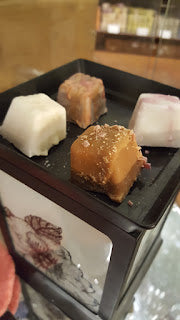
Making molded melts is incredibly simple. All you do is mix your scent into your votive/container mixture and pour into a non-stick cookie tray. The will pop out easily! There are so many fun shapes available at any store that sells cooking supplies. Or as the wax is setting up you can use cookie cutters. And don't forget that you can play with color! Simply make up different wax colors and pour or paint small amounts into impressions in the mold. You will want to make sure that your mold has depressions and not raised areas to do this. Simple and fun!
The best part about using the votive/container blend is that clean up of melters is a snap. The wax will contract and the used wax can be popped out. One thing to note is that the warmed wax will break down over time and will not be able to be re-used/re-scented and if it stays in the melter too long will be harder to get out. We noticed this when we were simply adding more wax to old wax over months of melting. So, just make sure you take out your old melt before putting in a new.
Also, we have found that non-stick pans make the best melts. Rubber and silicone work but they can break down over time and start to leave a white film on your melts.
Melts are fun and easy! And the best part is if you mess up just re-melt and start over! Happy Candle Making!!!
_________________________________________________________________________________
Instructions to make basic melts
1 pound Candle Cocoon Votive Wax
3oz Golden Brands 464
Scent according to tested usage
Dye as desired
Heat wax together until thermometer reads 180-190F. Add scent. (.6-.8oz per pound using Candle Cocoon scents) Stir for 2 minutes VIGOROUSLY! Pour into mold. Wait until cool. Pop out! Cure for 2 days. Use in your favorite melter!
That is it! Enjoy!!!
_________________________________________________________________________________


