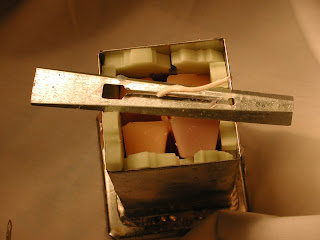
Confetti Pillar Candle Making with Pictures
Share

Equipment Needed
Metal skewer/hanger/metal knitting needle
Wax melter
Wire hinged clothespin
Pour Pot
Heat gun/blow dryer
Cookie sheet or pie tin
Hammer (optional)
Pillow case/deep box
3”x8” round aluminum mold
3”x3” aluminum foil
12'- CD8 or CD10 wick, 24ply or 1/0 square braid wick
36 oz Candle Cocoon llc pillar paraffin wax (mix of 140F paraffin, vybar 103, stearic acid, beeswax)
Fragrance oil (if desired) - add according to suppliers instructions
Or you can get the pillar candle making kit and use it with these instructions.
Instructions
Prepare Wick, Mold and Water Bath
1) Prime Wick (if not already done)—immerse wick into hot wax ~170 degrees F and let soak until bubbles no longer emerge. Take out of pot and use clothes pin to push wax into center of wick.


2) While the wick is still hot roll the tip of the wick between thumb and forefinger while pulling wick to elongate the tip. The tip may need to be scraped to eliminate wax build-up.
3) Gently run fingers down the length of the wick to straighten it. Do this until wax has cooled and hardened.
4) Insert rounded tip of wick into the bottom of the mold, thru the hole and out the top. Leave about 2” of wick out the top.
5) Heat the mold sealer until it is pliable but not sticky. Heat top of mold with heat gun. Fold wick around hole like a snail. Apply the mold sealer to top of hole and work sealer with fingers out towards the edge of the mold. Press firmly.
6) (Optional) Put aluminum foil over the mold sealer to protect from dirt.
7) Prepare cool water bath. It will need to be deep enough to completely immerse the candle mold up to just above where the wax fills it. (Don't forget about water displacement)
Prepare Wax Confetti pieces
8) Divide wax into 3 equal portions.
9) Add desired amount of dye dye to one portion of wax.
Test color
10) Stir and pour ~1/4” into votive mold. (Or pour directly onto heat safe area and let harden.)
11) Cool votive mold in water bath. Be careful not to allow water to get into sample. Repeat sample test until desired color is achieved. (Warm wax will differ in color greatly from cool wax)
12) Add scent to liquid dyed wax.
13)Stir vigorously for about 2 minutes.
14) Pour into a pie plate,ice tray, bread pan or cookie sheet.
15) Repeat steps 9-15 for the two other portions of wax.
16) Let cool
17) Break up the wax with fingers if warm. Pieces should be small (~1/2”x1/2”). Or cut with butter knife.
18) Combine and mix the chunks of the three colors in a bowl.
Pour Candle
19) Heat the inside of the mold.
20) Pack chunks into the mold to the top.
21) Heat 1 additional pound of undyed wax to 180 degrees F and add scent. (Stir for 2 minutes)
22) Heat the sides of the mold with heat gun for a few seconds. The chunks will sink. Add more chunks at the top.
23) Press center and push chunks to the outside.
24) Pour hot wax (~170F) to within 1/2” of top of mold. Tap mold on table (To release air) and poke 4-5 times with skewer all around candle to release air bubbles. Do this quickly.
25) Submerge mold in cool water bath without allowing water to spill into the mold.
26) Let sit in cool water for about 2 minutes. (This will create a shiny coat on the outside of the candle.)
27) Poke again and add more wax as needed. Keep releasing air until wax becomes too cool.
28) Let candle sit in safe place and cool.
29) Let candle sit until well forms in center of candle.
30) Heat small amount of wax to ~180 degrees F.
31) Poke skewer about 3/4” from side and around wick. Pour wax. Keep poking to let air bubbles escape. Be careful not to poke too deeply...stop when resistance is felt. Also be careful not to poke too close to sides of mold because marks show on the candle surface.
32) Poke 2 or 3 more times...as needed.
33) Allow to cool (~12 hours)
Remove Candle from Mold
34) Heat foil quickly and remove. Try not to tear the foil.
35) Heat sealer with heat gun. Make sure not to heat too much...do not melt candle.
36) Remove mold sealer.
37) Scrape wick clean with finger nail.
38) Gently pull wick to remove candle.
Finish Candle
39) Cut about 1/2” into wax at bottom of candle and cut wick.
40) Level Candle on a hot surface.
I hope this tutorial is helpful! Please let us know if you have any questions.
Lyschel


